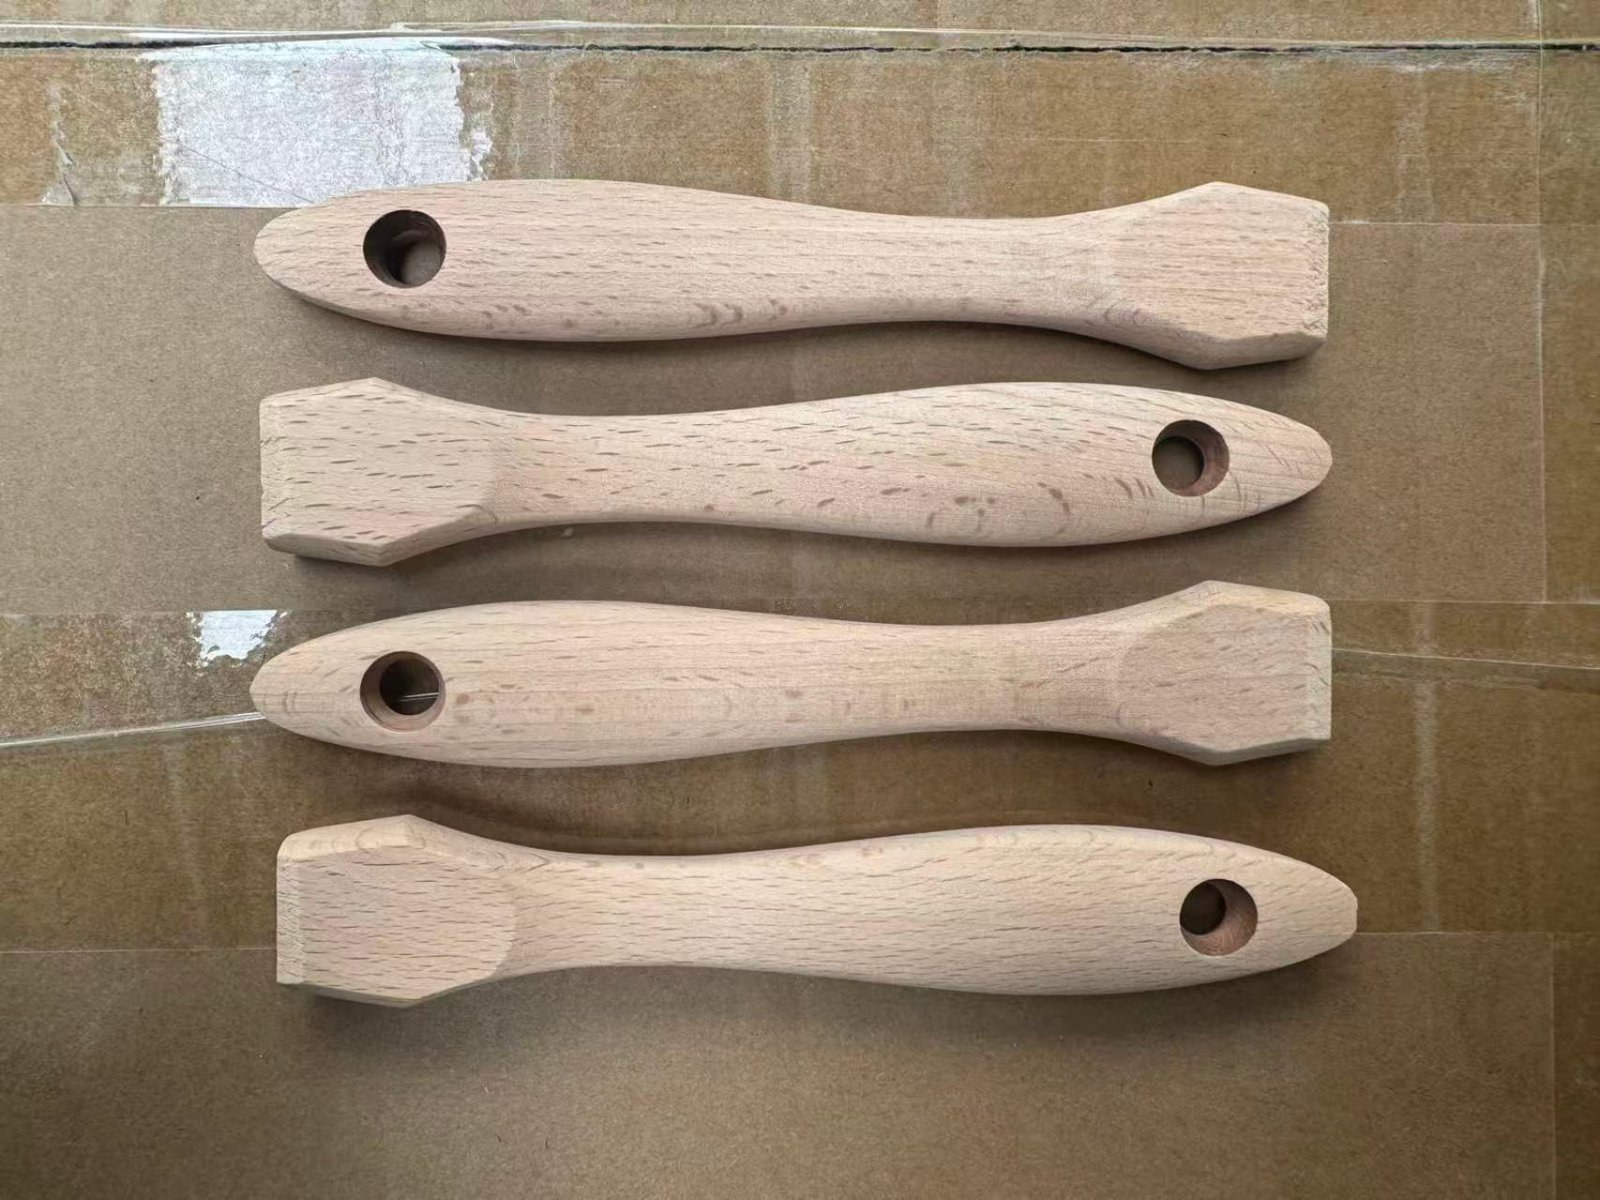
You pick up a sample brush handle, and a sharp splinter immediately catches your skin. It ruins the user experience and damages your brand reputation instantly. How do we stop this from happening?
Defining "no splinters" means going beyond visual inspection. It requires a tactile standard where all angular edges are rounded, hole edges are clean, and surfaces are sanded to at least 240-grit. It means zero impact marks, bruises, or raised grain are present on the final product.
I often see buyers struggle with vagueness when talking to factories. They say "make it smooth," but the factory hears "sand it once." This gap in communication causes pain for everyone. In my thirty years of manufacturing at JDW, I have learned that "smoothness" is an engineering specification, not a feeling. We need to look at the physics of the wood and the mechanics of the machine. If we do not define the standard, we cannot control the result. Let me explain how we define and achieve a true splinter-free finish.
Where Do Splinters Usually Appear on a Wooden Handle?
Most defects happen in the same three spots on every handle. Knowing exactly where to look saves you time and protects you during quality inspections.
Splinters hide at chamfering points due to dull blades, around drilled holes from unstable fixtures, and on curved grips where sanding belts wore out. You must focus your attention here first to catch quality issues.
In my experience, splinters are rarely random. They are evidence of a specific failure in the manufacturing process. When I walk through my factory floor, I do not look at the flat surfaces first. Flat surfaces are easy. I look at the transitions.
The first major area is the chamfering point. This is where the flat side of the handle meets the angled edge. If the saw blade used for this cut is dull, it does not slice the wood fibers clean. Instead, it tears them. This tearing creates a small, ragged edge that feels rough. We also see this if the saw arbor—the part holding the blade—is not perfectly centered. A lack of concentricity causes the blade to wobble, creating a "chatter" mark that feels like a series of small splinters.
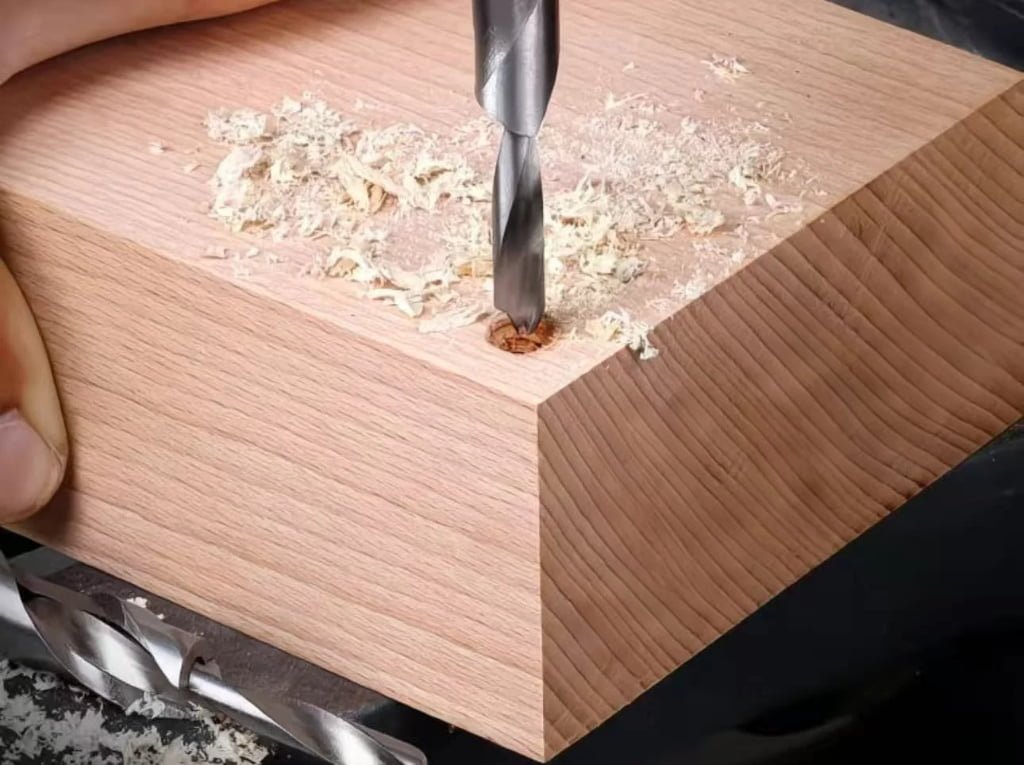
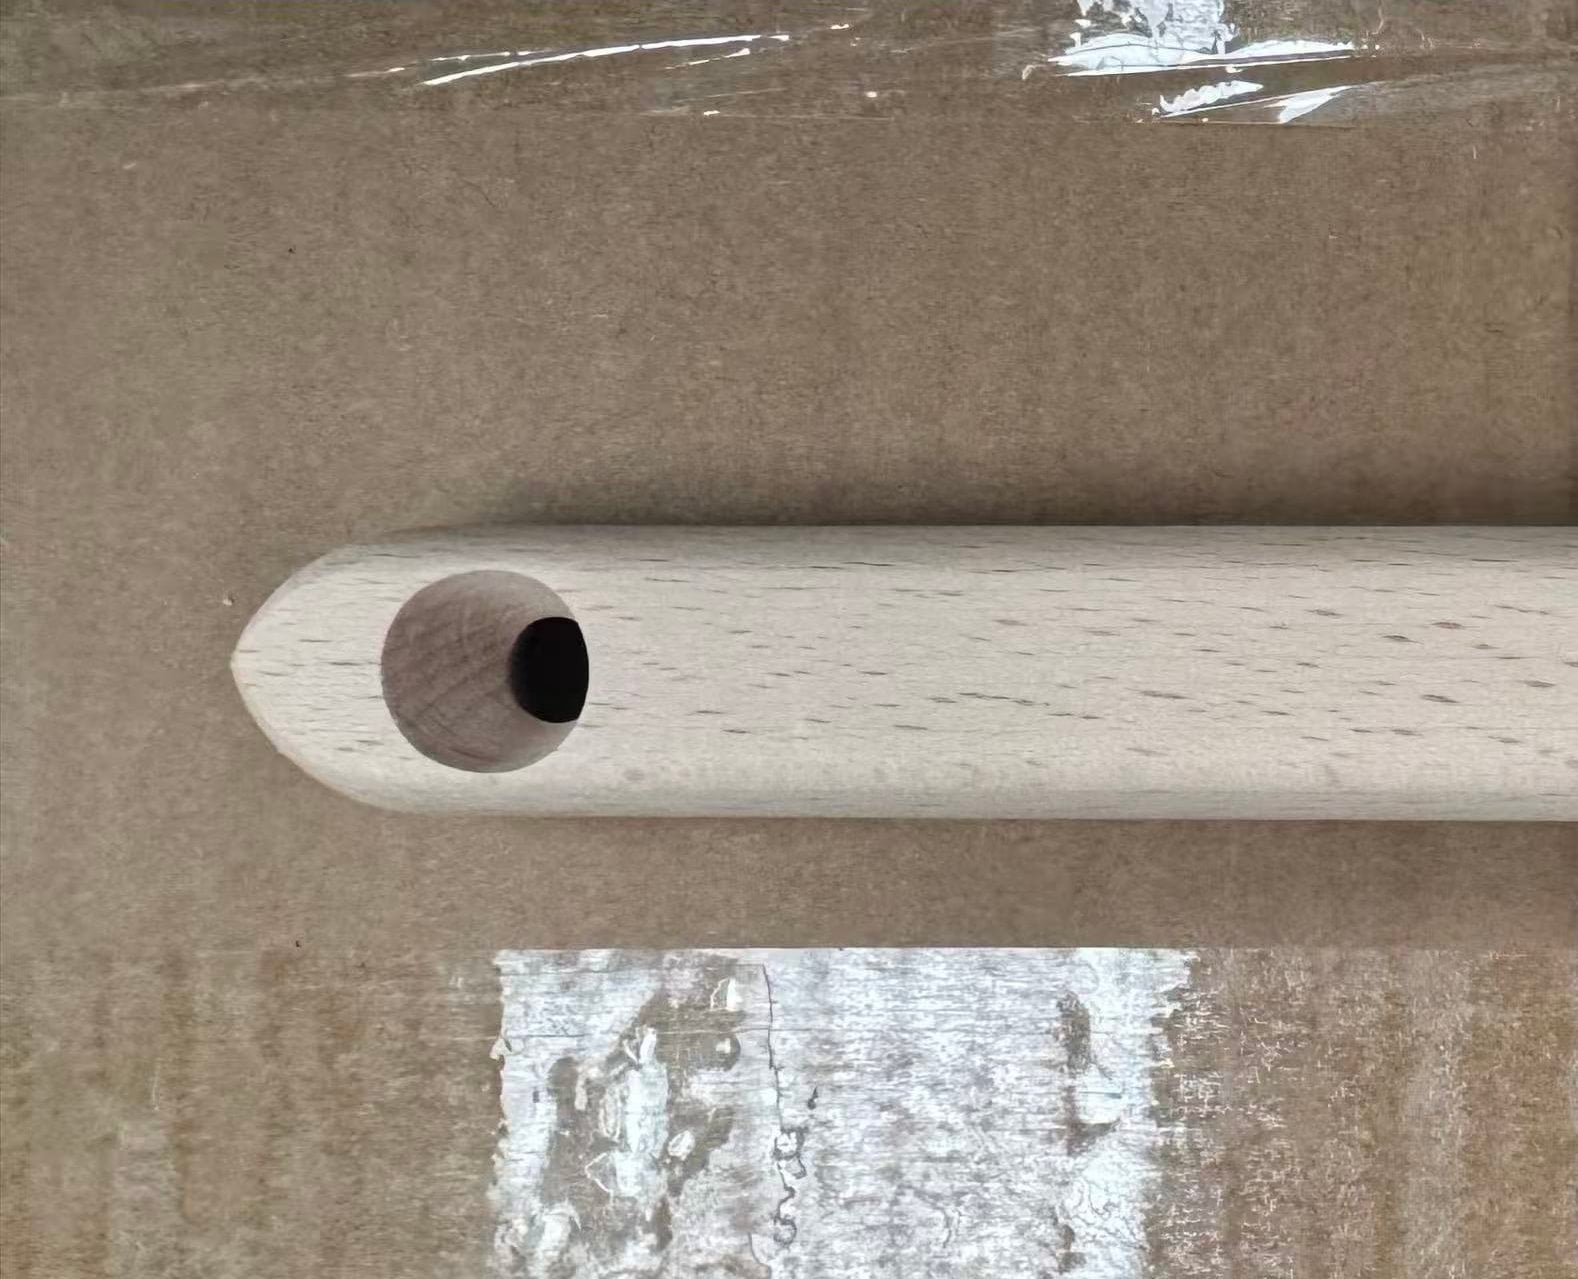
The second area is the hole edge. Almost every brush handle has a hole for hanging or for the ferrule rivet. This is a high-risk zone. If the drill bit is dull, or if the motor speed is too slow, the bit will punch through the wood rather than cutting it. This causes "blowout" on the exit side of the hole. Furthermore, if the fixture holding the wood is unstable, the handle vibrates during drilling. This vibration creates a rough, fuzzy interior to the hole that catches on the user’s skin.
The third area is the curved grip surface. This is the ergonomic part of the handle. Sanding a curve is harder than sanding a flat board. If the worker does not replace the sanding belt in a timely manner, the grit becomes clogged with sawdust. The belt stops cutting and starts burning or compressing the fibers. Later, these compressed fibers pop back up, creating a rough feel. Also, incomplete sanding strokes on these curves leave "steps" or ridges.
Here is a breakdown of the defects and their mechanical causes:
| Defect Location | Primary Cause | The Mechanical Failure |
|---|---|---|
| Chamfer / Bevel | Dull Tooling | The blade tears fibers instead of shearing them. |
| Drill Hole | Low RPM / Instability | Drill bit punches through; fixture allows vibration. |
| Curved Grip | Clogged Sanding Belt | Friction heat raises grain; worn grit fails to smooth. |
| End Grain | Saw Blade Drag | The blade marks the ends of the handle during cutoff. |
I once had a client who only checked the flat face of the handle. Everything looked fine. But when their customers started using the brushes, complaints poured in about cuts on their thumbs from the ferrule hole. We had to rework the entire batch. Now, we treat these transition points as critical control points. Learn more about our Brush handle products.
How Do We Check for Splinters During Inspection?
You might think inspection starts with the finished wood product. Actually, real quality control starts much earlier with the machines that cut the wood.
We check machinery stability first, as this solves 70% of issues. Then we inspect during profile milling, sanding, and final packing to ensure 100% compliance before shipping. This prevents defects rather than just sorting them.

I always tell my production managers: "Do not inspect the wood, inspect the cutter." If the machine is right, the wood will be right. In our factory, we have a rule that machine stability addresses 70% of burr and splinter issues.
The first step in our inspection is checking vibration stability. If a milling machine vibrates, the cutter hits the wood at inconsistent angles. This creates a surface that looks like waves on the ocean. Even if you sand it later, the density of the wood changes at the bottom of those waves. We check the motor mounts and the floor bolting. Next, we inspect the sharpness of cutting tools and drill bits. A sharp tool makes a quiet sound. A dull tool makes a loud, tearing sound. My team knows to listen to the machines. If the sound changes, we stop the line immediately.
We then move to the process inspections. We check for burrs at three specific stages:
- During Profile Milling (Shaping): This is when the raw square timber becomes a handle shape. The operator picks up every tenth piece and runs their thumb over the cut profile. They are looking for "tear-out." If the grain is torn here, sanding will not fix it. It must be rejected now.
- During the Sanding Process: This is critical. We use a multi-stage sanding process. The inspector checks if the sanding belts are clean. A clogged belt leaves scratch marks. We also check the pressure of the sanding pads. Too much pressure burns the wood; too little leaves the mill marks visible.
- During Final Inspection: This is the "White Glove" stage. Before packing, we do a tactile test. We do not just look; we feel. We run a cotton glove or a nylon stocking over the handle. If there is even a microscopic splinter, the fabric will snag. This is the ultimate test.
When we inspect, we also look for bruises and impact marks. Wood is soft. If a handle falls from a conveyor belt into a bin, it can get dented. A dent is not a splinter, but it breaks the smooth surface. Often, the wood fibers around a dent will later lift up, creating a rough spot. We treat impact marks with the same severity as splinters.
By placing inspection stations at the milling and sanding stages, we catch errors before they are finished. This saves money and ensures that the final check is just a confirmation of excellence, not a frantic search for bad products. Learn more Understanding Wood Machining Defects.
How Do We Reduce the Risk of Splinters in Production?
Great machines cannot fix bad wood. The raw material you choose determines the final smoothness of the handle and its resistance to splintering.
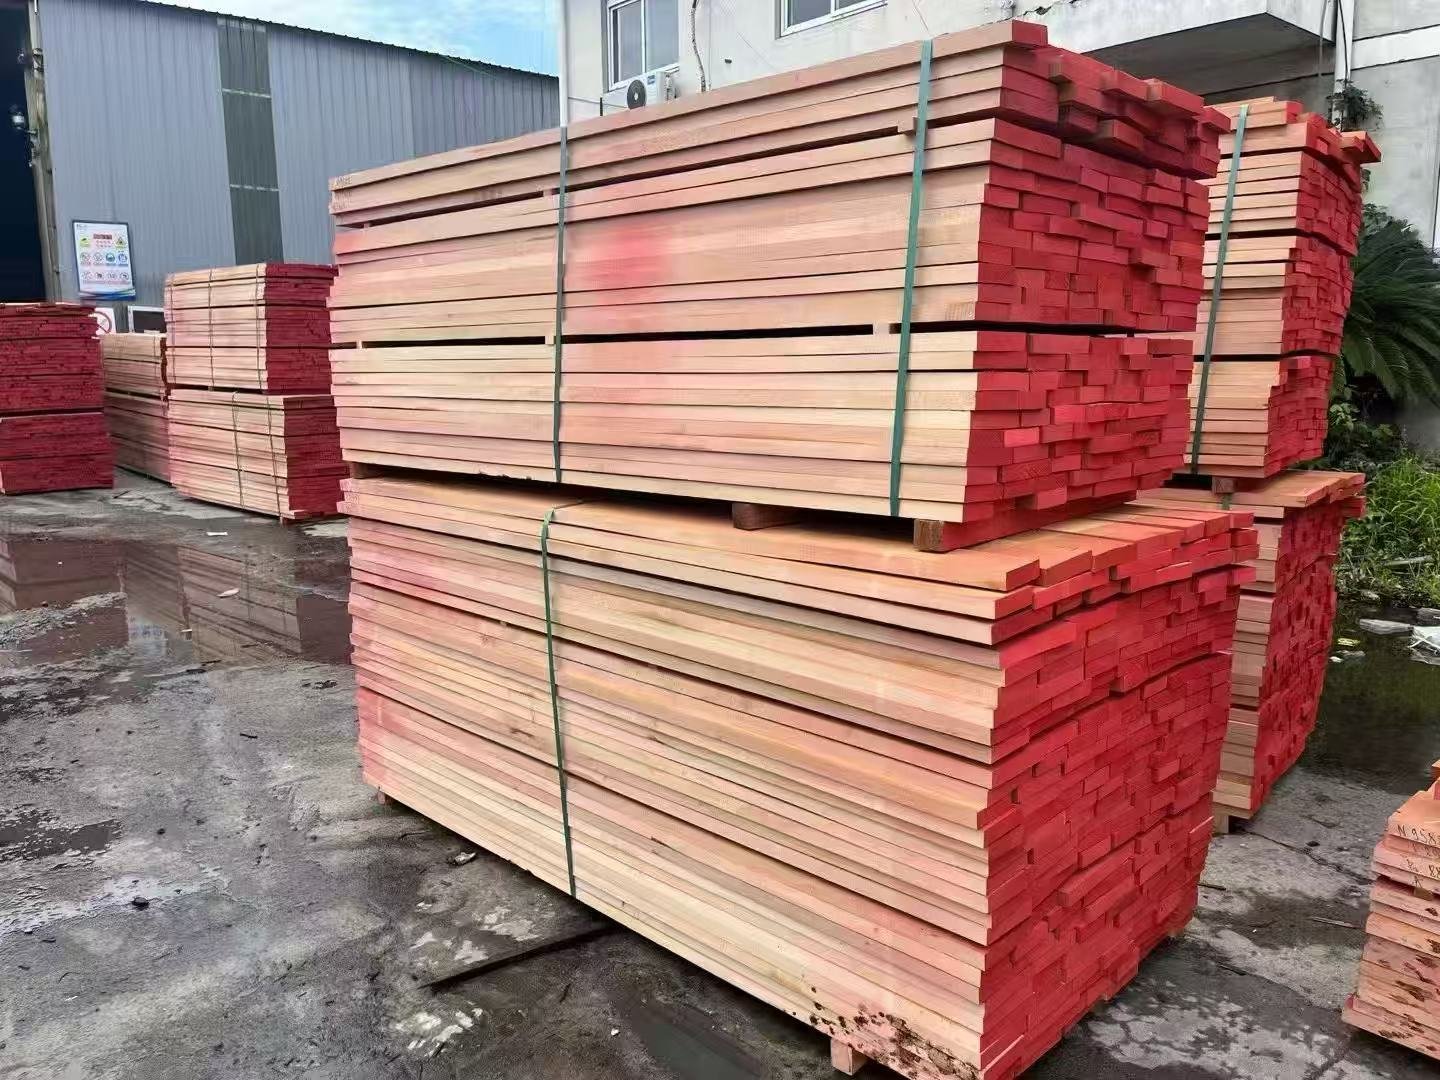
Reducing splinters requires using European kiln-dried lumber with moisture content below 12%. We also select Grade A timber to minimize knots that cause irregular grain tearing and tool deflection during the shaping process.
I have seen many factories try to save money by buying cheaper, local wood or air-dried timber. This is a mistake. The foundation of a splinter-free handle is the cellular structure of the wood itself.
We primarily use kiln-dried lumber imported from Europe, specifically Beech and Birch. Why Europe? Because the forestry management there produces trees with consistent growth rings. Consistent rings mean consistent density. When the density is uniform, the knife cuts smoothly. If the wood has hard and soft spots, the knife jumps, creating a splinter.
The most critical factor is Moisture Content (MC). We guarantee an MC below 12%. Here is why this matters: Wood is like a bundle of straws. When it is wet, those straws are swollen and soft. If you try to cut wet wood, it does not slice cleanly; it fuzzes. It creates a surface that feels like peach skin. You can sand it, but as the water evaporates later, the fibers stand up again. This is called "grain raising." By ensuring the wood is dry (below 12%) before we cut it, the fibers are stiff and brittle. They snap off cleanly under the knife, leaving a glass-smooth surface.
We also insist on Grade A timber. This grade allows for very few knots. A knot is the base of a branch. The wood in a knot is incredibly hard and the grain direction swirls around it. When a high-speed cutter hits a knot, two things happen. First, the cutter might deflect or bounce, leaving a mark on the wood. Second, the grain around the knot often tears out in big chunks. By paying a premium for knot-free wood, we eliminate these hazards.
We also look at the species characteristics.
- Beech: Has very tight, short grain. It is the gold standard for brush handles because it rarely splinters. It takes a polish very well.
- Ash: Has an open grain structure. It looks beautiful, but the open pores can feel rough if not filled. It requires more sanding steps.
- Pine: Very soft. It bruises easily and splinters are long and sharp. We rarely recommend this for high-end tools.
Here is how we categorize material risk:
| Wood Type | Splinter Risk | Processing Requirement | Cost Impact |
|---|---|---|---|
| European Beech (Grade A) | Very Low | Standard high-speed milling. | High |
| Birch | Low | Requires sharp tools; prone to fuzz if wet. | Medium |
| Rubberwood | Medium | High silica content dulls tools fast. | Low |
| Poplar | High | Very soft; tears easily. Hard to sand smooth. | Low |
By controlling the input—the wood—we control the output. It is simple chemistry and physics.
How Can Buyers Add a Simple “No Splinters” Requirement to an RFQ or PO?
Clear contracts prevent bad products. You must translate "good quality" into specific engineering terms that the factory cannot misunderstand or ignore.
Specify key inspection areas like chamfers and holes in your contract. Require a "smooth to touch" standard and explicitly mandate sanding with 240-grit sandpaper to eliminate ambiguity between you and the supplier.

I have been on the receiving end of thousands of Purchase Orders (POs). The ones that cause problems are the ones that are vague. Terms like "good quality" or "nice finish" mean nothing. In China, "good quality" might mean "it works," while in Canada, it means "it is perfect." You need to bridge this cultural and linguistic gap with numbers and specific locations.
Throughout my 20-plus years of working with clients, our most successful partnerships started with detailed technical specifications. Here is how you should write your requirement.
First, define the grit. Sanding is measured in grit. A lower number is rougher; a higher number is smoother. Standard cheap production stops at 120 or 180 grit. This feels smooth initially but feels rough after a humidity change. You should specify: "Surface finish must be sanded to a minimum of 240-grit. Final pass must be with fresh belts." This tells the factory you know the process.
Second, call out the risk zones. Do not just say "handle." Say: "Chamfered edges and drill hole exits must be free of tear-out. Edges must be eased (rounded) with a minimum 0.5mm radius." This forces the factory to look at those specific spots.
Third, define the test method. In your Quality Control (QC) section, add: "Inspection will be conducted using the tactile glove test. Any snagging of fabric constitutes a defect. Visual inspection alone is insufficient." This gives your QC team the power to reject goods that look okay but feel bad.
Here is a sample clause you can copy into your next RFQ:
Surface Finish Specification:
- Material: Grade A European Beech, Kiln-Dried (MC < 12%).
- Sanding: All surfaces to be machine sanded to 240-grit. Final finish must be smooth to the touch with no raised grain.
- Defects: Zero tolerance for splinters, burrs, or tear-out at:
- The ferrule connection point.
- Any drilled hanging holes.
- The chamfered end of the handle.
- Tactile Standard: Products must pass a cotton-glove wipe test without snagging.
- Impacts: No visible bruises, dents, or machine chatter marks allowed on the grip surface.
When you write this, you are not being difficult. You are being professional. As a manufacturer, I respect a client who knows what they want. It makes my job easier because I have a clear target to hit. It eliminates the argument of "is this good enough?" If it hits the spec, it is good. If not, we fix it.
By defining "No Splinters" this clearly, you protect your brand from bad reviews and your company from liability. You move from hoping for quality to demanding it.
Conclusion
To ensure a splinter-free wooden handle, you must control the wood moisture, maintain sharp machinery, and specify 240-grit sanding in your contract. Quality is not accidental; it is engineered.